Posts from the ‘Photography Tips’ Category
🌌 Chasing the Northern Lights: A Fun Guide to Aurora Photography Settings
Have you ever looked up at the night sky, seen a shimmering green arc, and thought: Wow, if only I could capture that! Good news—you can! Whether you’re a curious beginner or one of my art collectors who loves the stories behind my images, this guide is designed to make aurora photography approachable, fun, and rewarding.
Let’s walk through how to capture weak, medium, and strong auroras with your camera, your GoPro, and even with sweeping panoramic images.
📷 Camera Settings for Aurora Photography
The aurora is a living, dancing light show. It can be faint and ghostly one minute, then bright and racing across the sky the next. That means your settings need to adapt to its strength.
🌟 Strong Aurora
ISO: 800–1600 Shutter: 2–6 seconds Aperture: f/2.8 (or wider) Why: The lights are bright and fast. Short exposures keep them crisp, not blurry.
✨ Medium Aurora
ISO: 1600–3200 Shutter: 6–10 seconds Aperture: f/2.8 Why: Balanced approach—enough light without smearing the details.
🌙 Weak Aurora
ISO: 3200–6400 Shutter: 10–20 seconds Aperture: f/2.8 Why: Push your settings to pull detail out of the faint glow.
💡 Pro Tip: Check your histogram after each shot—if everything is clumped to the left, it’s too dark!
🎥 GoPro Timelapse Settings
Yes, the humble GoPro is a powerful aurora-capturing machine! It won’t rival a DSLR in low light, but it’s perfect for timelapse videos that bring the aurora’s dance to life.
Mode: Night Lapse Photo ISO Max: 1600–3200 Shutter: Auto, or fixed at 15–20 seconds in very dark skies Interval: 30–60 seconds (longer = smoother timelapse) White Balance: Native or 4000K for natural tones
Mount it on a tripod, aim it north, and let it click away while you enjoy the show.
🖼️ Panorama Aurora Photography
Sometimes the aurora stretches from horizon to horizon—too wide for even your widest lens. That’s when panorama comes to the rescue.
Mount your camera on a sturdy tripod. Lock your settings (ISO, aperture, shutter) for consistency. Start at one edge of the aurora and shoot your first frame. Rotate the camera about 30% overlap and shoot again. Continue across the sky until you’ve covered the whole arc. Stitch the images later using Lightroom, Photoshop, or PTGui.
💡 Pro Tip: Use portrait orientation (vertical shots). You’ll capture more sky and foreground to play with in your stitched panorama.
🎒 Aurora Photography Packing List
Make sure you’re ready when the sky lights up. Here’s what I always bring:
✅ Camera with wide-angle lens (f/2.8 or wider) ✅ Tripod (rock solid is best!) ✅ Intervalometer or remote release ✅ GoPro (for timelapse fun) ✅ Extra batteries (the cold drains them fast!) ✅ Headlamp with red light (to protect night vision) ✅ Warm layers & hot chocolate 😉
✨ Final Thoughts
Aurora photography is half science, half magic. Settings matter, yes—but so does patience, location, and a willingness to stay up past midnight. Some nights the aurora dances wildly; other nights it hides. But when everything aligns—the clear skies, the geomagnetic storm, your camera pointed north—it feels like the universe is painting just for you.
So whether you’re chasing the northern lights in Wisconsin, Iceland, Alaska, or beyond, I hope this guide helps you feel confident to give it a try. Who knows? Maybe you’ll capture an image that becomes your own treasured piece of art.
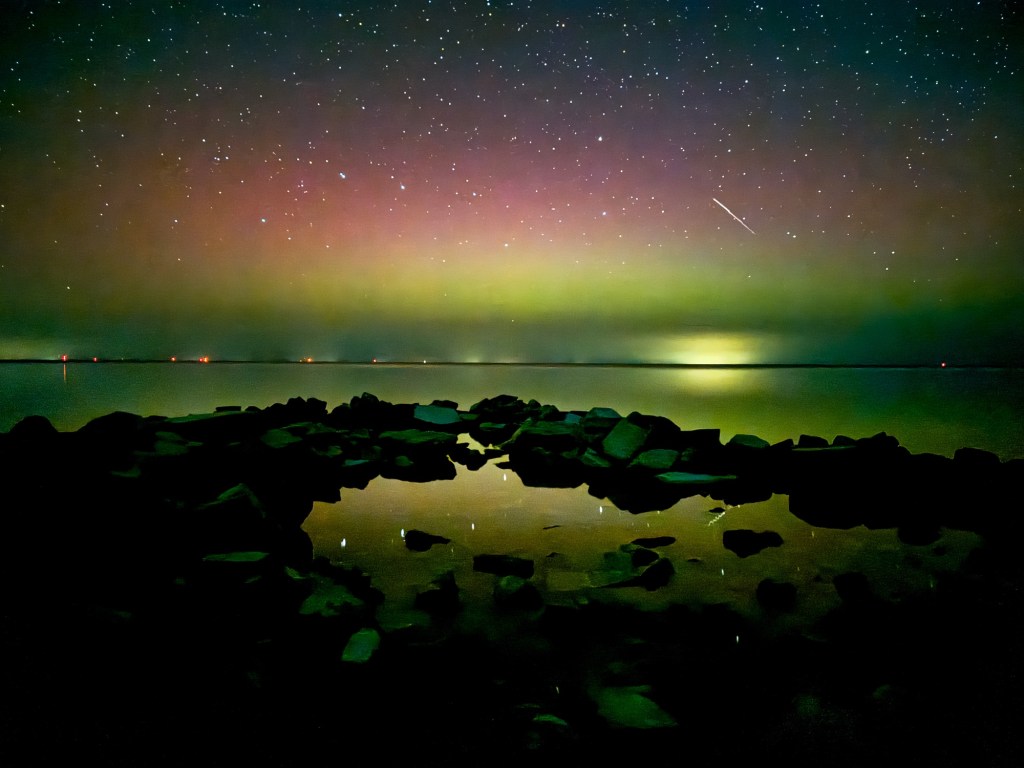
“Aurora Borealis glowing over Peninsula State Park in Door County, Wisconsin – September 1, 2025. A night when the sky turned into a canvas of dancing light, perfectly illustrating the magic that careful settings and patience can reveal.”
🌌 When the Sky Dances: How the Aurora Borealis Affects the Human Body and Mind
By Zsuzsanna Luciano, Fine Art Conservation Photographer
Last Year, I Lost My Direction Beneath the Northern Lights
Last fall, I found myself deep in the Wisconsin woods, bundled in wool and fleece, standing under a sky that shimmered like a celestial ocean. The aurora borealis was directly overhead for several hours – green flames twisting into violet ribbons, pulsing and expanding like some living cosmic entity.
I was there to photograph it. But something strange happened.
I lost my sense of direction. Not poetically. Literally. My inner compass—normally sharp from years of navigating wilderness—just shut off. I walked in the wrong direction for nearly an hour one night, convinced I was heading back to our camper.
I felt euphoric, mesmerized, and oddly disconnected from time. And it turns out, I’m not alone.
What Exactly Is the Aurora Borealis?
The aurora is caused by charged particles from the sun colliding with gases in Earth’s atmosphere. These interactions generate breathtaking light displays—commonly green, but also pink, purple, red, and even blue.
It’s more than just pretty lights. The aurora is an electromagnetic phenomenon, affecting Earth’s magnetic field—and possibly us humans, too.
The Surprising Effects on the Human Body
🧭 1. Magnetic Confusion: Your Internal GPS May Malfunction
Did you know your brain contains tiny magnetic particles called magnetite? Like migratory birds, humans may use Earth’s magnetic field for orientation.
When auroral activity is strong, that magnetic field fluctuates—and that might throw off your sense of direction.
When I was under the aurora for multiple nights, I completely lost my bearings. GPS helped, but something inside me wasn’t working the same. It’s both fascinating and a little spooky.
😵💫 2. Dreamy, Euphoric, and a Bit Foggy
Many aurora-watchers report experiencing:
A dreamlike or timeless state Deep emotional surges—tears, awe, peace Cognitive fog, forgetfulness, or mild confusion
Scientists suggest this could be due to:
Melatonin disruption (the light confuses your sleep-wake cycle) Electromagnetic brainwave interaction, which may influence emotion or perception Sleep deprivation and overstimulation from the experience itself
Personally, I felt like I was floating through a lucid dream I didn’t want to wake from. My camera kept me tethered to reality, but barely.
📸 3. The Photographer’s Experience: Art, Exhaustion, and Ecstasy
Photographing the aurora is a unique blend of technical patience and emotional overwhelm. You wait for hours in the dark, monitor cloud cover, adjust your camera with freezing fingers… and then—boom—the sky explodes.
But it takes a toll:
Extreme cold (I’ve shot in -22°F with a camera battery tucked in my bra!) Sleep deprivation (auroras peak between 10 p.m. and 2 a.m.) Isolation and mental strain, especially during multi-night shoots
During one shoot in Iceland, I lived off trail mix and instant coffee for four days, barely sleeping between bursts of light and wonder. I wasn’t tired at the time—but I crashed hard afterward.
Are There Healing Effects of the Aurora?
Some believe auroras have healing properties, particularly in the realm of energy and bioelectromagnetism. While research is still emerging, anecdotal experiences include:
Vivid dreams and increased intuition Enhanced meditative or spiritual states A sense of deep reconnection with nature and the cosmos
📘 Curious? Explore Bioelectromagnetics Journal
Fascinating Aurora Facts
🌍 Other planets have auroras—Jupiter’s are enormous 👂 Some people hear them—a faint crackling or hissing sound 🐾 Animals, including whales and reindeer, react to auroral shifts 📸 You can photograph auroras in real-time with high ISO and a tripod 📱 Use apps like My Aurora Forecast to plan your night
Final Thoughts: When the Lights Find You
The aurora borealis isn’t just something to see—it’s something that happens to you. It changes your rhythm, your senses, even your perception of time and direction.
As a photographer, I live for these moments. But as a human being, I leave changed each time.
So if you ever find yourself under a sky that glows like a living flame, don’t be surprised if you forget where you are—or even who you are—for just a little while. That’s part of the magic.
About Me
I’m a fine art conservation photographer traveling across North America with my husband and son. When I’m not exhibiting at juried art festivals, I chase storms, wildlife, and the mysteries of the natural world. Follow along on IG or join my newsletter for behind-the-scenes stories and new limited edition art drops.


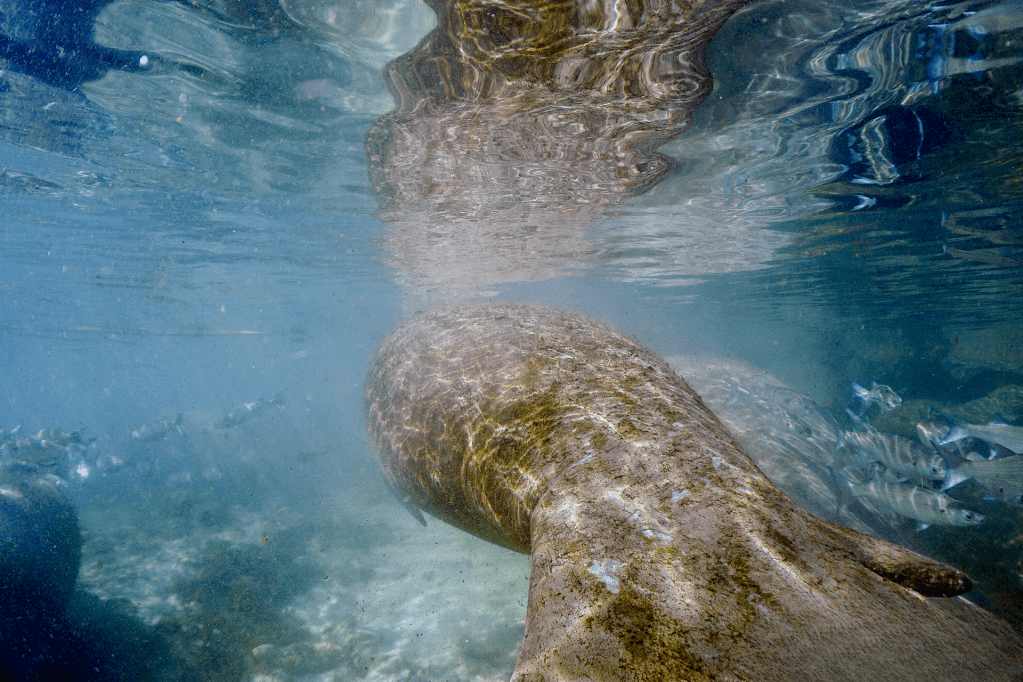
How to edit underwater photographs
Editing underwater photographs requires special techniques to enhance the colors and clarity of the images. Here are some steps to help you edit underwater photographs effectively:
- Adjust White Balance: Underwater photos often have a blue or green tint due to water filtering out red light. Use the white balance tool in your editing software to correct the color cast and restore natural colors.
- Enhance Contrast and Exposure: Adjust the contrast and exposure settings to improve the overall brightness and clarity of the image. This can help bring out details in the underwater scene.
- Remove Backscatter: Backscatter refers to the tiny particles in the water that can appear as white specks in your photos. Use the spot healing brush or clone stamp tool to remove backscatter and clean up the image.
- Enhance Colors: Use the saturation and vibrance settings to boost the colors in your underwater photos. Adjust the hue and color balance to make the colors appear more vibrant and true to life.
- Sharpen and Add Details: Apply sharpening and noise reduction filters to enhance the details and sharpness of the underwater image. Be careful not to over-sharpen, as it can create artifacts in the photo.
- Crop and Straighten: Crop the image to remove any distracting elements and improve the composition. Straighten the horizon line if needed to ensure a balanced and visually appealing photo.
- Add Filters and Effects: Experiment with filters and effects to enhance the mood and atmosphere of the underwater scene. Consider adding a vignette or adjusting the lighting to create a more dramatic effect.
- Save and Export: Once you are satisfied with the edits, save the edited image in the highest quality possible. Consider exporting the image in a format that preserves the colors and details for sharing or printing.
It’s important to practice and experiment with different editing techniques to find the best approach for your underwater photographs. Additionally, using specialized editing software designed for underwater photography can help streamline the editing process and achieve professional results.
Enjoy the ride👍