Archive for
🌌 Chasing the Northern Lights: A Fun Guide to Aurora Photography Settings
Have you ever looked up at the night sky, seen a shimmering green arc, and thought: Wow, if only I could capture that! Good news—you can! Whether you’re a curious beginner or one of my art collectors who loves the stories behind my images, this guide is designed to make aurora photography approachable, fun, and rewarding.
Let’s walk through how to capture weak, medium, and strong auroras with your camera, your GoPro, and even with sweeping panoramic images.
📷 Camera Settings for Aurora Photography
The aurora is a living, dancing light show. It can be faint and ghostly one minute, then bright and racing across the sky the next. That means your settings need to adapt to its strength.
🌟 Strong Aurora
ISO: 800–1600 Shutter: 2–6 seconds Aperture: f/2.8 (or wider) Why: The lights are bright and fast. Short exposures keep them crisp, not blurry.
✨ Medium Aurora
ISO: 1600–3200 Shutter: 6–10 seconds Aperture: f/2.8 Why: Balanced approach—enough light without smearing the details.
🌙 Weak Aurora
ISO: 3200–6400 Shutter: 10–20 seconds Aperture: f/2.8 Why: Push your settings to pull detail out of the faint glow.
💡 Pro Tip: Check your histogram after each shot—if everything is clumped to the left, it’s too dark!
🎥 GoPro Timelapse Settings
Yes, the humble GoPro is a powerful aurora-capturing machine! It won’t rival a DSLR in low light, but it’s perfect for timelapse videos that bring the aurora’s dance to life.
Mode: Night Lapse Photo ISO Max: 1600–3200 Shutter: Auto, or fixed at 15–20 seconds in very dark skies Interval: 30–60 seconds (longer = smoother timelapse) White Balance: Native or 4000K for natural tones
Mount it on a tripod, aim it north, and let it click away while you enjoy the show.
🖼️ Panorama Aurora Photography
Sometimes the aurora stretches from horizon to horizon—too wide for even your widest lens. That’s when panorama comes to the rescue.
Mount your camera on a sturdy tripod. Lock your settings (ISO, aperture, shutter) for consistency. Start at one edge of the aurora and shoot your first frame. Rotate the camera about 30% overlap and shoot again. Continue across the sky until you’ve covered the whole arc. Stitch the images later using Lightroom, Photoshop, or PTGui.
💡 Pro Tip: Use portrait orientation (vertical shots). You’ll capture more sky and foreground to play with in your stitched panorama.
🎒 Aurora Photography Packing List
Make sure you’re ready when the sky lights up. Here’s what I always bring:
✅ Camera with wide-angle lens (f/2.8 or wider) ✅ Tripod (rock solid is best!) ✅ Intervalometer or remote release ✅ GoPro (for timelapse fun) ✅ Extra batteries (the cold drains them fast!) ✅ Headlamp with red light (to protect night vision) ✅ Warm layers & hot chocolate 😉
✨ Final Thoughts
Aurora photography is half science, half magic. Settings matter, yes—but so does patience, location, and a willingness to stay up past midnight. Some nights the aurora dances wildly; other nights it hides. But when everything aligns—the clear skies, the geomagnetic storm, your camera pointed north—it feels like the universe is painting just for you.
So whether you’re chasing the northern lights in Wisconsin, Iceland, Alaska, or beyond, I hope this guide helps you feel confident to give it a try. Who knows? Maybe you’ll capture an image that becomes your own treasured piece of art.
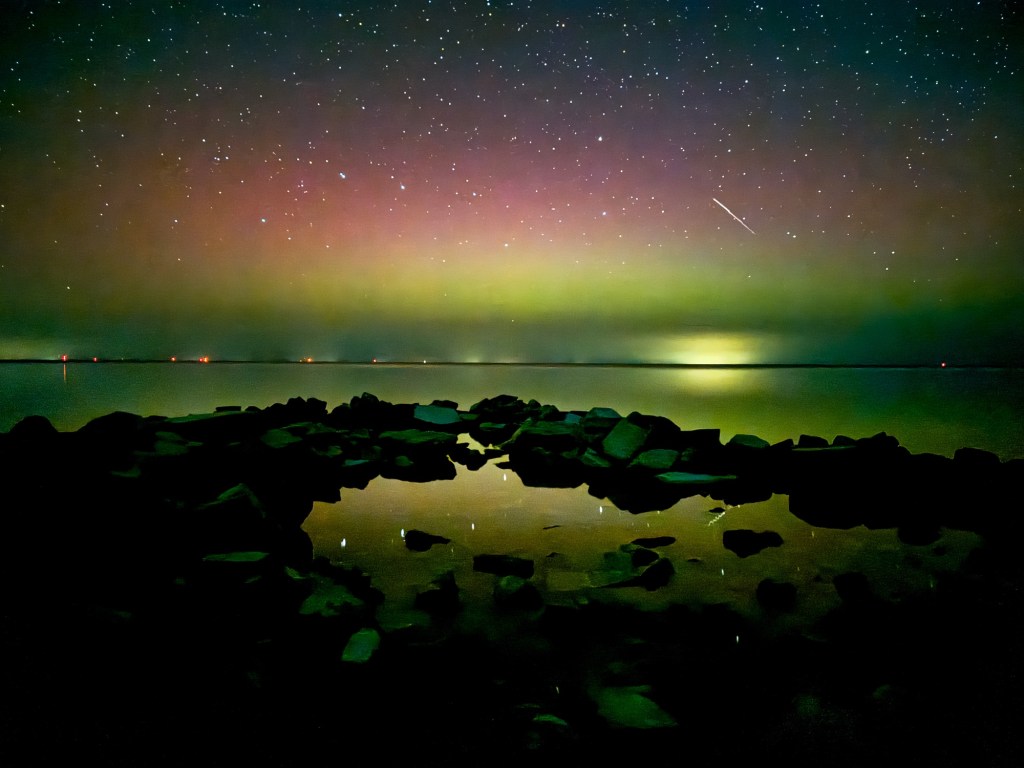
“Aurora Borealis glowing over Peninsula State Park in Door County, Wisconsin – September 1, 2025. A night when the sky turned into a canvas of dancing light, perfectly illustrating the magic that careful settings and patience can reveal.”

